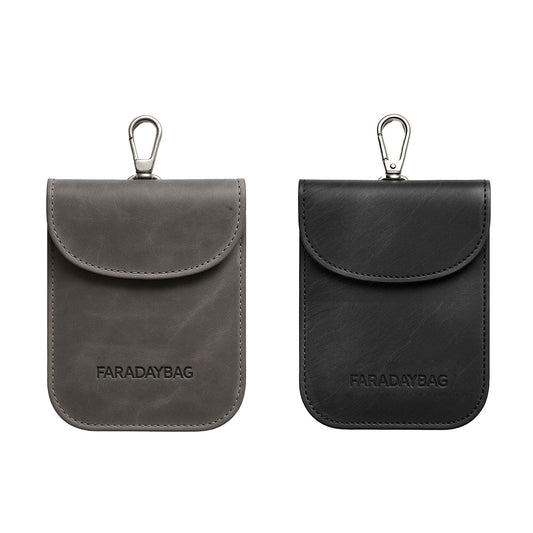
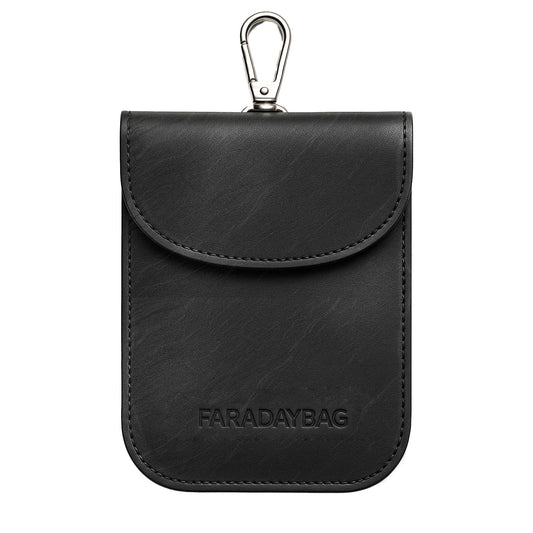
Quick answer: To make a Faraday cage, you need a fully enclosing conductive shell (a metal container, wire mesh, or conductive fabric), an insulating layer inside so devices don't touch the metal, and a sealed closure with no gaps. Line a metal container with cardboard, close it tightly, and test it by calling a phone sealed inside — if the call doesn't connect, your cage is working. The details below cover three build methods, the materials that matter, and the mistakes that make most DIY cages fail.

What Is a Faraday Cage?
A Faraday cage is an enclosure made of conductive material that blocks electromagnetic fields (EMF) and radio frequencies (RF). Named after Michael Faraday, who demonstrated the principle in 1836, these enclosures work by redistributing electrical charge around the outside of the conductive shell, so external fields don't reach the interior — and signals from a device inside can't get out.
The same principle is used at every scale: MRI rooms in hospitals, shielded test chambers in electronics labs, Faraday bags for phones and key fobs, and the DIY builds in this guide.
Why Build a Faraday Cage?
- Protecting spare electronics against electromagnetic pulse (EMP) scenarios as part of emergency preparedness
- Blocking RFID and keyless-entry signals to prevent unauthorized scanning or car relay theft
- Privacy on demand — a phone sealed inside can't be pinged, tracked, or remotely accessed
- Isolating devices for testing — checking what your electronics do without network access
- Science education — it's one of the most satisfying physics demonstrations you can build at home
How a Faraday Cage Actually Works (and Why Gaps Ruin It)
Two practical rules follow from the physics, and they explain almost every failed DIY build:
- The shield must be continuous. Electromagnetic waves leak through openings. A mesh cage still works because mesh openings must be much smaller than the wavelength of the signal you want to block — cellular and Wi-Fi wavelengths range from a few centimeters up, so fine mesh (holes of a few millimeters) blocks them, while chicken wire with 25mm holes leaks badly at those frequencies.
- Seams and lids are the weak points. A metal box with a loose lid is not a Faraday cage — it's a metal box with an antenna slot. Every seam needs metal-to-metal contact or conductive tape.
Choosing Your Materials: Comparison
| Method | Cost | Effort | Best for | Weak point |
|---|---|---|---|---|
| Metal container (ammo box, cookie tin, steel trash can) | $0–20 (often already owned) | Minutes | Storing spare electronics, EMP preparedness | Lid seal — usually needs conductive tape |
| Aluminum foil (3+ layers) | ~$5 | Minutes | Emergency/temporary shielding of one device | Tears easily; single layers leak |
| Wire mesh on a frame | $30–100 | Hours | Larger enclosures, multiple devices | Seams between mesh panels; door contact |
| Conductive shielding fabric | ~$56 per panel | Minutes–hours | Flexible builds: lining boxes/pouches, wrapping irregular shapes | Edges must overlap generously |
For sealing seams in any of these builds, double-conductive EMI shielding tape makes a real difference — ordinary duct tape is an insulator and does nothing for shielding.
How to Make a Faraday Cage – Three Builds, Step by Step
1. Simple DIY Faraday Cage with a Metal Container
The easiest build uses an existing metal container — an ammo box, a cookie tin, or a galvanized steel trash can (a classic for larger preparedness storage).
Materials Needed:
- A metal container with a tight-fitting metal lid
- Insulating liner (cardboard, foam, or a rubber mat)
- Aluminum foil or conductive tape for the lid seam
- A phone or radio for testing
Instructions:
- Line the interior: Cut cardboard or foam to cover every inside surface. Devices must not touch the metal — a device in contact with the shell can couple to it and defeat the shielding.
- Seal the lid seam: If the lid doesn't make firm metal-to-metal contact all the way around, wrap the seam with conductive tape or press foil into the gap. Paint and rust are insulators — sand contact surfaces bare if needed.
- Test it: Seal a phone inside and call it from another phone. No ring = working cage. Test every time you change how you pack it.

2. Building a Faraday Cage Using Wire Mesh
For larger volumes — several devices, radios, backup drives — build a box from fine copper or aluminum mesh on a rigid frame.
Materials Needed:
- Fine copper or aluminum mesh (openings of a few millimeters — not chicken wire)
- Wooden or PVC frame
- Metal screws, staples, hinges
- Conductive tape for seams
Instructions:
- Build the frame: A simple cube or rectangle sized to your needs.
- Wrap every face in mesh — including top and bottom. Overlap panels by several centimeters at every joint.
- Bond the seams: Staple or screw the overlaps, then run conductive tape along each seam. Every panel must be electrically connected to its neighbors.
- Mind the door: The opening needs overlapping mesh flaps or a compressible conductive edge — a door that just rests against the frame will leak.
- Test with the phone-call method before trusting it.
3. Emergency Faraday Cage with Aluminum Foil
Foil is the fastest temporary option for a single device.
Instructions:
- Wrap the device in plastic or cardboard first (insulation layer).
- Wrap with at least three layers of heavy-duty foil, folding seams over tightly each layer — no gaps, no pinholes.
- Test by calling the device. If it rings, add layers and re-fold the seams.
Common Mistakes That Make DIY Faraday Cages Fail
- Loose or painted lid contact — the #1 failure. Paint, rust, and rubber gaskets break the conductive path.
- Device touching the bare metal shell — always insulate the interior.
- Single foil layer — thin foil tears invisibly at folds; use three layers minimum.
- Mesh openings too large — chicken wire is not shielding at cellular/Wi-Fi frequencies.
- Assuming appliances work — a microwave oven or refrigerator is not a reliable Faraday cage; both routinely leak enough for a phone to keep receiving signal.
- Testing once and never again — seals degrade with use. Re-test periodically.
What a DIY Faraday Cage Can and Can't Do (Honestly)
A well-built DIY cage that passes the phone-call test genuinely blocks the everyday signal bands that matter — cellular, Wi-Fi, Bluetooth, GPS, RFID/NFC. But be honest with yourself about the limits:
- You can't verify attenuation levels without lab equipment. The phone-call test proves "blocks a phone signal here, today" — it doesn't give you a certified performance number, and neither does this article. Anyone quoting exact dB figures for a foil-and-tin build is guessing.
- EMP performance is unknowable at home. A sealed all-metal container is the standard preparedness approach, and nesting (a foil-wrapped device inside an insulated metal box) adds margin — but no home build can be verified against an actual pulse. We say the same about our own products: see our honest take in EMP Faraday bags.
- Convenience is the real trade-off. A trash-can cage works, but you won't carry it to the car. That's the practical reason tested commercial Faraday bags exist — sewn shielding layers, proper closures, and a form factor you'll actually use daily.
Build or Buy? Faraday Cage vs. Faraday Bag
- Build a cage when you need volume (many devices, long-term storage), enjoy the project, or want a preparedness setup on a budget.
- Buy a bag when you need daily-carry convenience — phone privacy on the go, key fob relay-theft protection, travel. See our picks by use case, or if you want a middle path, sew your own Faraday bag from the same shielding fabric we use.
Testing Your Faraday Cage
Test more than one type of connection after each build and record the result. Use the five-step signal-blocking test checklist for repeatable phone, Wi-Fi, Bluetooth and GPS checks, while remembering that a household result is not laboratory shielding certification.
Always test after building, and re-test when anything changes:
- ✔️ Cell phone test: Seal a phone inside and call it. No ring = working. Also try sending a text and checking it arrives only after removal.
- ✔️ Radio test: A playing FM radio should go silent inside a good cage (FM's longer wavelengths are actually easier to block than cellular).
- ✔️ Key fob test: Seal your car key inside and try unlocking the car from a step away — it shouldn't respond.
- ✔️ RF meter test: An RF meter lets you compare signal strength readings inside vs. outside the enclosure — remember a meter measures fields, it never blocks them.
FAQs About Faraday Cages
Q: Can I make a Faraday cage from a shoebox?
Yes — wrap it in at least three overlapping layers of aluminum foil with no gaps, and keep the device insulated from the foil. Treat it as temporary; foil degrades with handling.
Q: Will a microwave oven work as a Faraday cage?
Not reliably. Microwave doors are designed to block 2.4 GHz microwave energy, but phones on other bands often still receive signal inside. Test yours — most fail.
Q: Does a Faraday cage need to be grounded?
No. Grounding doesn't change how well the enclosure blocks external radio signals — the shield works by redistributing charge whether grounded or not. Grounding matters mainly for static discharge in large walk-in installations.
Q: Can a Faraday cage block 5G signals?
Yes — a properly built and sealed cage blocks common RF bands including 5G, Wi-Fi, and Bluetooth. Higher-frequency (mmWave) 5G has shorter wavelengths, which makes fine mesh and tight seams even more important.
Q: Does it block GPS?
Yes. GPS is just another RF signal (~1.5 GHz); a working cage blocks it like the rest — that's why forensic investigators store seized phones in shielded enclosures.
Q: Is my car a Faraday cage?
No — cars have windows, plastic panels, and deliberate antenna paths. Your phone works fine in a car, which is the proof.

Further Reading
- What Is a Faraday Cage? — the principle in depth
- How to Build a Faraday Shield — flat-panel shielding projects
- How to Make a DIY Faraday Bag — the sewn, portable version
- Does a Faraday Bag Really Work? — testing methodology
- How to Measure EMF at Home — using meters properly
Conclusion
A working Faraday cage comes down to three things: a continuous conductive shell, an insulated interior, and a genuinely sealed closure — then a real test to prove it. Start with the metal-container build (it takes minutes), test it with a phone call, and scale up to mesh or fabric builds if you need more room. And if what you actually need is shielding you can carry every day, that's the problem a good Faraday bag already solves.